
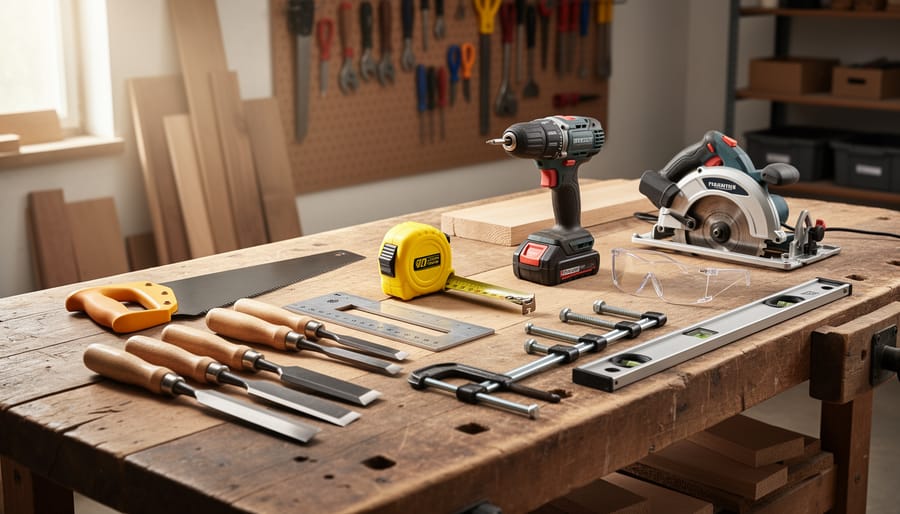
Every successful carpentry project begins with the right tools in your hands. Whether you’re building your first bookshelf or tackling a complete kitchen renovation, having these 25 essential tools means you can work confidently, safely, and with professional results from day one.
The good news? You don’t need to spend thousands upfront or feel overwhelmed by endless options. Building a solid carpentry toolkit is a journey, not a race. Start with measuring and marking tools like a quality tape measure and combination square, add fundamental cutting tools such as a hand saw and chisels, then gradually expand to power tools like a cordless drill and circular saw as your skills and projects grow. Many retailers now offer convenient options like free shipping or same-day pickup, making it easier than ever to gather what you need without breaking your budget.
This comprehensive list walks you through each tool’s purpose, what to look for when buying, and how it fits into your growing carpentry practice. You’ll learn which tools deserve priority investment, which ones can wait, and how to maintain everything so your workshop serves you for years. The transformation from someone holding an unfamiliar tool to a confident woodworker creating beautiful, lasting work happens one project at a time, and it starts with knowing exactly what belongs in your toolbox.
How We Chose These Essential Carpentry Tools
We built this carpentry tools list by listening to our community of learners and experienced woodworkers, then testing what actually matters on real projects. Every tool here earned its place by meeting three standards: versatility across multiple home improvement tasks, accessibility for beginners without sacrificing value for seasoned craftspeople, and a quality-to-value ratio that respects your investment.
We prioritized tools that support sustainable craftsmanship practices, meaning they’re built to last, can be maintained and sharpened rather than discarded, and help you develop fundamental skills that deepen your connection to the wood. This isn’t a list of every tool that exists. It’s the core collection that empowers you to tackle most home carpentry projects with confidence, from framing and trim work to furniture building and repairs. These are the tools our students reach for again and again, the ones that transform raw lumber into something beautiful and functional.
Measuring and Marking Tools
1. Tape Measure: Your Most-Used Tool
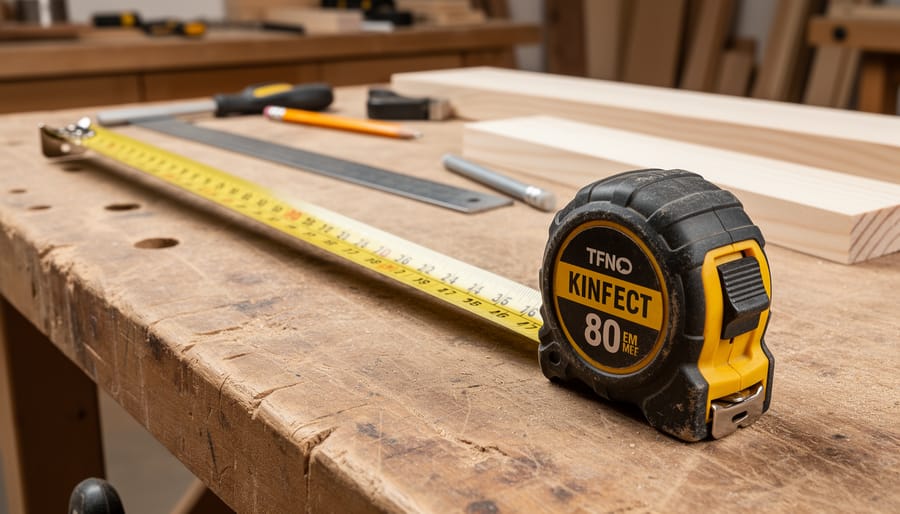
A quality tape measure will become your constant companion in carpentry, you’ll reach for it dozens of times in every project. The 25-foot length handles most home improvement tasks, from measuring room dimensions to checking lumber lengths, while still fitting comfortably in your tool belt or pocket.
Look for a tape with a locking mechanism that holds your measurement in place, preventing frustrating retractions when you’re working alone. The case should feel sturdy in your hand, not flimsy or likely to crack if dropped. Clear markings matter more than you might think: you want easily readable numbers and fractions, ideally with both standard and metric scales. A standout, the distance the tape extends before bending, of at least seven feet makes measuring across spaces much easier without needing a helper.
The hook at the tape’s end is designed to slide slightly, accounting for inside and outside measurements automatically. Check that it moves smoothly but not loosely. A comfortable grip with some rubberized texture helps during long measuring sessions and prevents the tape from slipping out of sweaty hands. This simple tool teaches you to measure twice and cut once, the carpenter’s golden rule that saves materials and prevents costly mistakes.
2. Combination Square: Precision Marking Made Easy
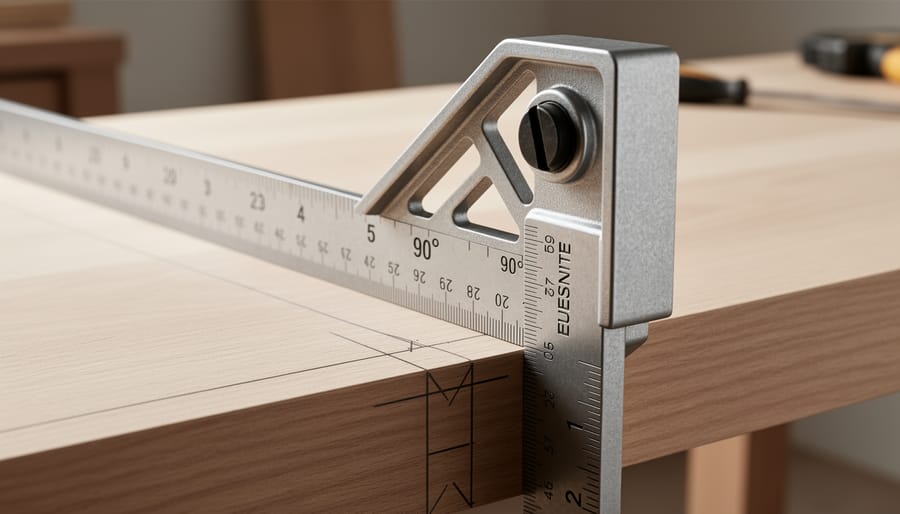
A combination square does more than measure, it’s your go-to reference for accurate angles throughout every project. This L-shaped tool combines a metal ruler (typically 12 inches) with a sliding head that locks at any position along the blade. The head features machined faces set at exactly 90 degrees and 45 degrees, letting you quickly check whether corners are square or mark perfect miters for trim work.
What makes it indispensable is versatility. Use the ruler edge to draw straight layout lines, the square head to verify cabinet corners are true, or the built-in scribe to mark lines parallel to an edge. Many models include a small level vial in the head and a removable scriber tucked into the handle. For joinery work, whether you’re cutting mortises, fitting drawer fronts, or assembling frames, the combination square ensures your angles are precise before you cut.
Choose one with clearly etched graduations and a head that locks firmly without slipping. The accuracy of your joinery depends on it.
3. Carpenter’s Pencil: Built for the Job
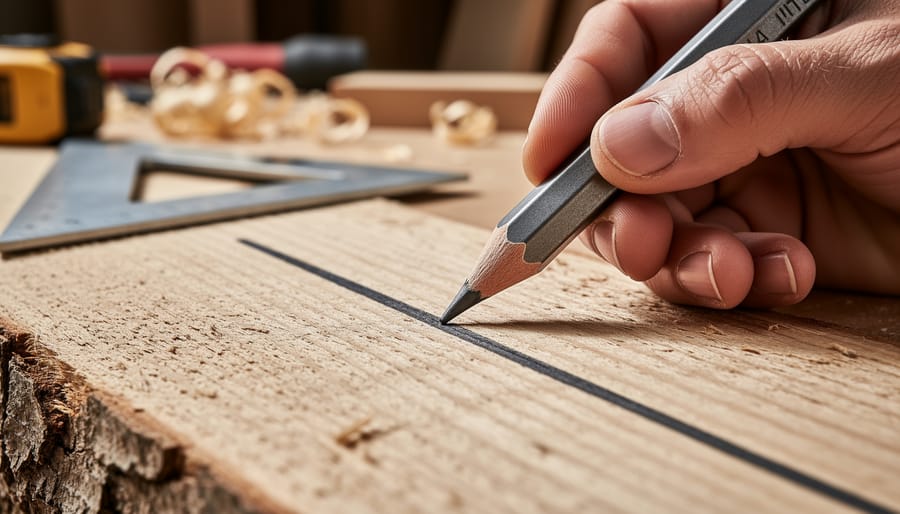
The carpenter’s pencil might look odd next to your regular office pencils, but that flat, rectangular shape is exactly what makes it indispensable on the job site. Unlike round pencils that roll off sloped surfaces or workbenches at the worst possible moment, the flat design stays put right where you set it down. The thick graphite core makes bold, highly visible marks that won’t disappear on rough, unplaned lumber or construction-grade wood, you can actually see your layout lines without squinting, even in less-than-ideal workshop lighting.
That wider lead also means your marks won’t break or crumble when you’re pressing hard enough to score deep reference lines. Keep a pencil sharpener designed for carpenter’s pencils in your tool belt, or learn to use a utility knife to whittle a chisel point that works for both broad marking and fine detail. A sharp carpenter’s pencil transforms from a basic marking tool into a precision instrument that helps you work confidently and accurately.
4. Level: Ensuring Everything Is True
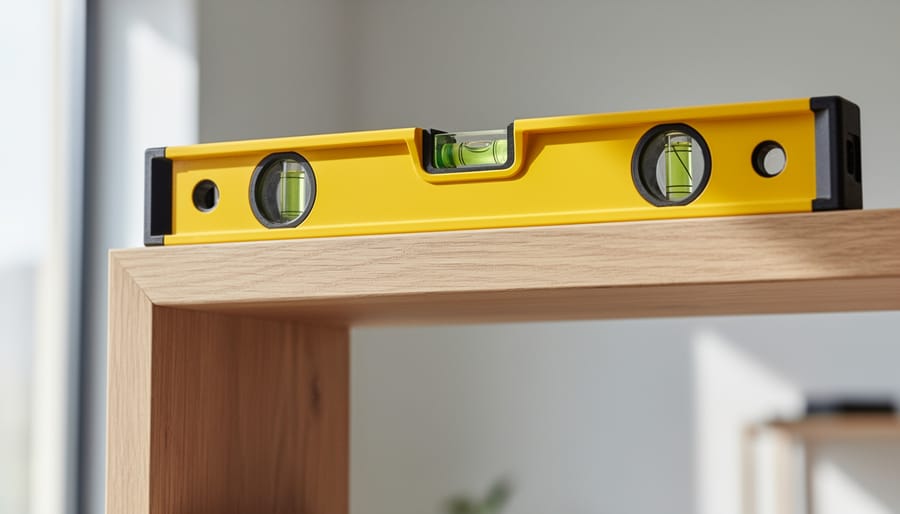
A level is your guarantee that shelves won’t slope, frames will stand plumb, and installations will look professionally done rather than noticeably crooked. For most home improvement carpentry, a 24-inch level handles tight spaces and detailed work, while a 48-inch level gives you the accuracy needed for longer runs like door frames, cabinet installations, and wall studs.
The tool works through liquid-filled vials with air bubbles inside. When the bubble centers perfectly between the marked lines, your surface is level (horizontal) or plumb (vertical). Most levels have at least two vials, one for checking horizontal planes and one for vertical. Quality matters here: a cheap level with inaccurate vials will compound errors across your entire project.
Test your level’s accuracy by placing it on a flat surface, noting the bubble position, then rotating it 180 degrees. If the bubble reads the same, it’s true. If not, you’re working with a tool that lies to you, worth replacing before it ruins your next installation.
Essential Hand Cutting Tools
5. Hand Saw: Traditional Cutting Power
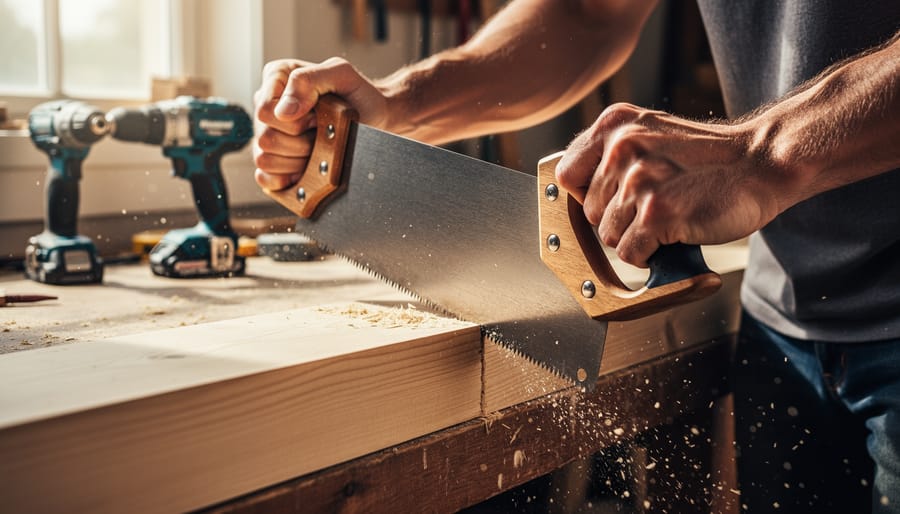
A quality hand saw connects you directly to the wood in ways power tools can’t replicate. You’ll need two types in your workshop: a crosscut saw for cutting across the grain (trimming boards to length, cutting plywood sheets) and a rip saw for cutting with the grain (breaking down dimensional lumber lengthwise). Crosscut saws have more teeth per inch and angled teeth that slice fibers cleanly, while rip saws feature fewer, chisel-like teeth that tear along the grain efficiently.
Mastering hand sawing teaches you how wood behaves, you feel grain direction, density changes, and knot locations through the handle. This sensory feedback makes you a better carpenter even when using power tools. Hand saws also shine for quick cuts where setting up a circular saw wastes time, and they’re quieter and safer for working around others. Look for a saw with comfortable grip, straight blade, and teeth appropriate to your most common tasks. A 15-inch crosscut saw with 8-10 teeth per inch handles most home improvement carpentry beautifully.
6. Coping Saw: For Curves and Intricate Cuts
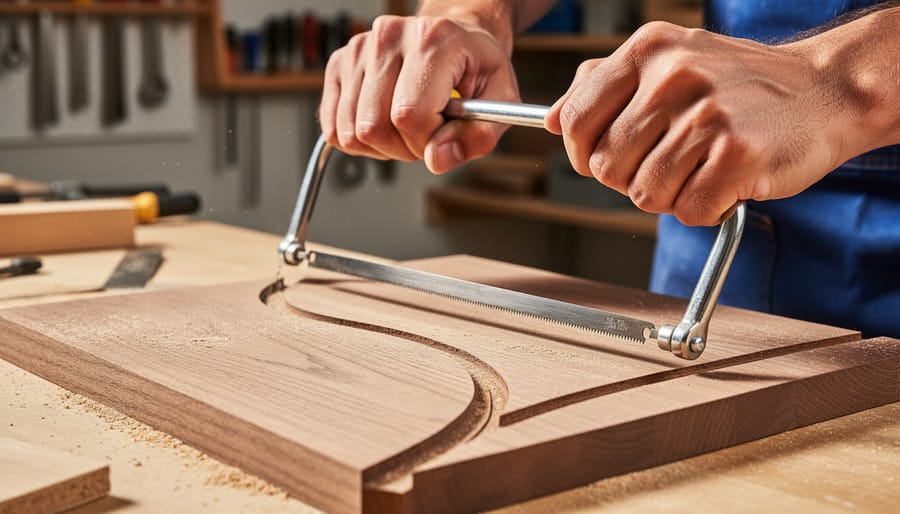
The coping saw earns its place in every carpenter’s toolkit through its remarkable ability to navigate tight curves and intricate patterns that would leave other saws struggling. Its design, a thin, flexible blade held taut in a C-shaped metal frame, lets you maneuver through scrollwork, cut out interior shapes, and trim complex joints with precision that hand saws and power tools simply can’t match.
You’ll reach for this tool when cutting coped joints for crown molding, creating decorative cutouts in shelving, or trimming dovetail waste. The blade rotates within the frame, allowing you to change cutting direction without repositioning your workpiece, a game-changer when following curved layout lines. For home improvement projects involving trim work or custom details, the coping saw transforms challenging cuts into manageable tasks.
Choose a model with comfortable handles and easy blade tension adjustment. Replacement blades are inexpensive, so keep extras on hand for different materials, finer teeth for hardwoods, coarser for softwoods.
7. Chisels: Precision Shaping and Joinery
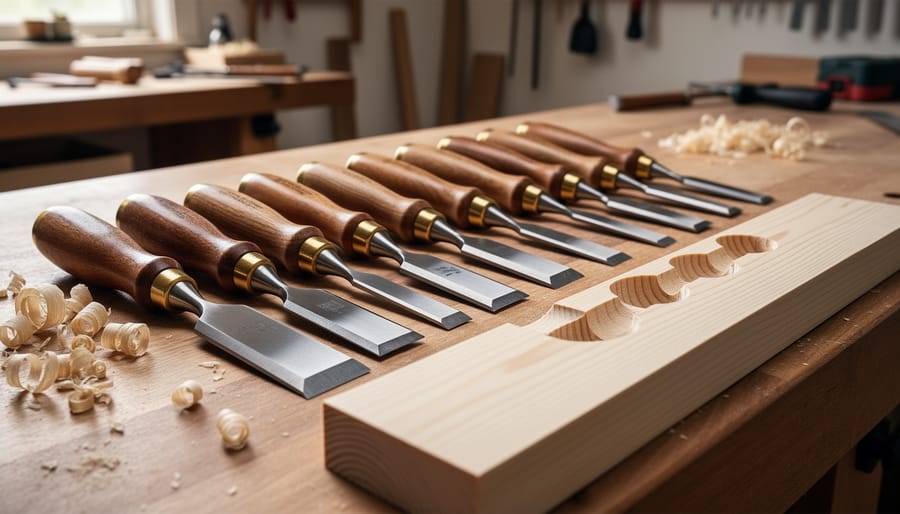
Chisels are the tools that connect you directly to the wood, allowing you to shape joints, refine edges, and achieve the precise fits that make carpentry truly satisfying. A basic set of four sizes, 1/4-inch, 1/2-inch, 3/4-inch, and 1-inch, covers the vast majority of home improvement carpentry tasks you’ll encounter. The 1/4-inch excels at fine detail work and narrow mortises, while the 1/2-inch and 3/4-inch handle most general joinery like door hinges and lock installations. The 1-inch chisel speeds through waste removal and wider cuts.
These tools shine when cutting mortises for hinges and locks, paring dovetail joints to perfect fit, and cleaning up saw cuts that need final adjustments. They’re also invaluable for shaving down door edges or trimming stubborn wood that prevents drawers from sliding smoothly.
Sharp chisels are safer and more effective than dull ones. Keep them honed with a sharpening stone or honing guide, maintaining the factory bevel angle around 25 to 30 degrees. Store them with blade guards or in a tool roll to protect those cutting edges. When you learn to read the grain and let a sharp chisel slice rather than force its way through wood, you’ll understand why experienced woodworkers treasure these simple tools.
8. Block Plane: Smoothing and Fitting Magic
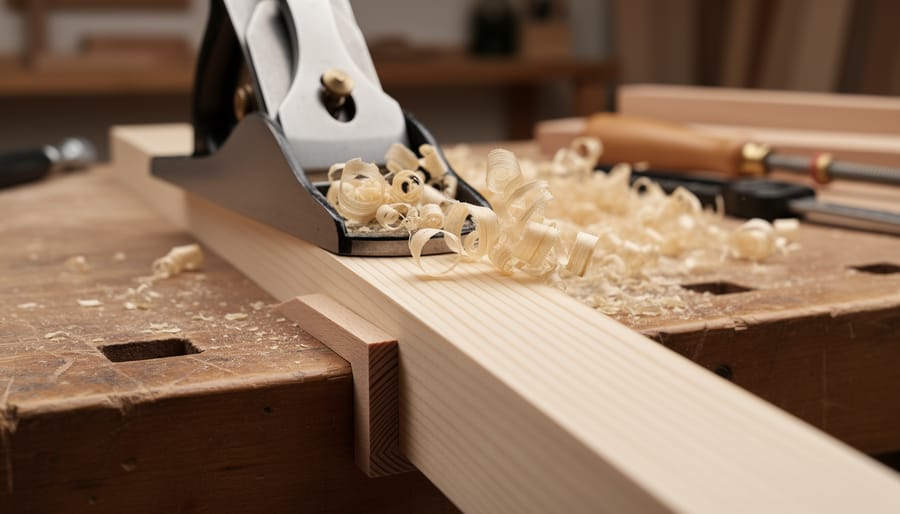
A block plane fits in your palm yet transforms how you work with wood. This compact tool, typically 5 to 6 inches long with a blade angle around 20 degrees, excels at tasks larger planes can’t handle. Use it to smooth rough end grain on cutting boards or shelf edges, shave tight-fitting doors until they swing freely, ease sharp corners with clean chamfers, and flatten high spots that prevent drawers from sliding smoothly.
What makes the block plane transformative for beginners is how quickly it teaches you to read wood grain and adjust your approach. Planing with the grain produces whisper-thin shavings and glass-smooth surfaces, while fighting against it leaves tearout and frustration. Within your first project, you’ll learn to angle the plane slightly, adjust blade depth with the thumbwheel, and feel the difference between sharp and dull cutting edges.
Look for a metal body that sits flat without rocking, a comfortable knob and handle, and an adjustment mechanism that holds settings without drifting. Even a modest block plane rewards you with immediate results and skills that carry through every carpentry project.
Power Tools for Efficiency
9. Cordless Drill/Driver: The Workhorse of Every Workshop
A cordless drill/driver earns its place as most carpenters’ first power tool purchase because it handles two essential tasks in one compact package. The drilling function bores clean holes through wood, metal, and masonry with the right bit, while the driving function quickly sinks screws without the fatigue of manual work.
Variable speed triggers let you start fasteners slowly for control, then ramp up once they’re seated. Torque settings, those numbered rings on the collar, prevent you from stripping screw heads or overdrivng into soft wood. Start low and adjust up until the clutch slips at the right depth.
Battery voltage matters: 12V models suit light assembly work and tight spaces, while 18V or 20V versions power through demanding tasks like deck building or framing. Lithium-ion batteries hold their charge longer and weigh less than older technologies. Having two batteries means one charges while you work with the other, eliminating frustrating downtime.
Look for a keyless chuck that tightens by hand, an LED work light for dimly-lit corners, and a comfortable grip for extended use. This single tool will follow you through countless projects, from hanging shelves to building furniture.
10. Circular Saw: Straight Cuts with Speed
The circular saw earns its reputation as a carpentry powerhouse by combining portability with serious cutting capacity. Most carpenters reach for a 7-1/4 inch model because it strikes the ideal balance, powerful enough to cut through two-by lumber in a single pass while remaining light enough for extended use and maneuvering sheet goods.
What makes this tool indispensable is its depth adjustment feature. You’ll twist a lever or turn a knob to set how deep the blade cuts, letting you make precise grooves, dados, or shallow cuts without fully severing material. This control proves invaluable when you’re notching studs or creating recesses for inlays.
The bevel capacity adds another dimension to your cutting options. Tilting the baseplate typically from zero to forty-five degrees means you can cut angles for roof rafters, decorative edges, or compound miters without repositioning your workpiece multiple times.
Where circular saws truly shine is breaking down full sheets of plywood or OSB and ripping dimensional lumber to width. Instead of wrestling an eight-foot two-by-ten across a table saw, you bring the circular saw to the material. Combined with a straightedge guide, you’ll achieve clean, straight cuts that rival stationary tools, making this the go-to choice for framing, decking, and rough carpentry where speed and mobility matter most.
11. Jigsaw: Versatile Curved and Straight Cutting
A jigsaw brings remarkable flexibility to your carpentry toolkit, handling tasks that would frustrate a circular saw. The secret lies in its narrow, reciprocating blade that moves up and down rather than spinning, perfect for following curves, cutting intricate patterns, and making interior cutouts without a starting edge.
What makes jigsaws truly versatile is the blade system. Swap in a wood-cutting blade for framing lumber, switch to a fine-tooth blade for plywood without tearout, or grab a metal-cutting blade when you need to trim a pipe or bracket. Most 2026 models use tool-free blade changes, so switching takes seconds.
You’ll reach for your jigsaw whenever straight lines won’t do the job. Need to cut around a pipe coming through the floor? Install a new kitchen sink in a countertop? Create decorative shelf brackets with curves? The jigsaw handles all of these. It excels at plunge cuts too, just tilt the saw forward, start the blade, and gradually lower it into the material to create an opening without drilling pilot holes.
For home improvement carpentry, this tool bridges the gap between rough cutting and detail work, giving you creative freedom to tackle projects beyond basic rectangles.
12. Random Orbital Sander: Smooth Finishes Made Simple
A random orbital sander combines circular pad motion with random orbital movement, which is exactly why it won’t leave those dreaded circular swirl marks that ruin an otherwise beautiful finish. The dual-action pattern ensures the sanding scratches never align in a consistent pattern, creating an even surface that’s genuinely ready for stain or paint. This tool transforms what used to be hours of tedious hand-sanding into a manageable task that produces superior results.
Understanding grit progression makes all the difference in your sanding outcomes. Start with 80-grit sandpaper to remove mill marks and level uneven surfaces, move to 120-grit for general smoothing, then finish with 180 or 220-grit for surfaces you’ll stain or paint. Never skip more than one grit level, jumping from 80 directly to 180 leaves deeper scratches that finer paper can’t eliminate, and they’ll show up dramatically once you apply finish.
For home improvement carpentry, this tool bridges the gap between acceptable and professional-looking work. Variable speed settings let you match the sanding action to your material and task, while dust collection ports keep your workspace cleaner and protect your lungs. The relatively light weight and two-handed grip design reduce fatigue during extended sessions, making it accessible even for beginners tackling their first furniture refinishing or trim installation project.
Fastening and Assembly Tools
13. Hammer: Time-Tested and Reliable
The 16-ounce claw hammer hits the sweet spot for most carpentry work, heavy enough to drive framing nails efficiently, light enough for finish work without fatigue. A lighter 12-ounce hammer feels whippy and requires more swings, while a 20-ounce framing hammer tires you out quickly on detailed projects.
The face design matters more than most beginners realize. A smooth face works for general carpentry, while a milled (waffle-pattern) face grips nail heads better for framing but can leave marks on finish surfaces. The claw’s curve should match your typical nail-pulling needs, a standard curve handles most situations, while a straight (rip) claw excels at demolition and prying.
Handle materials each have trade-offs. Wood handles absorb shock beautifully and feel traditional in your hand, but they can break with side loads or missed strikes. Fiberglass handles offer durability and excellent vibration dampening. Steel handles with rubber grips provide maximum longevity, though some carpenters find them harsher on the elbow.
Choose a hammer that balances well in your grip, hold several before buying. A well-chosen hammer becomes an extension of your arm, making every strike count.
14. Screwdriver Set: Manual Control When You Need It
A quality screwdriver set belongs in every carpenter’s toolbox because there are times when manual control beats power every time. You need both Phillips head and flathead drivers in multiple sizes, small, medium, and large in each type covers most home improvement fasteners you’ll encounter. The right size matches the screw head exactly, preventing stripped screws and damaged work.
Manual screwdrivers give you precise torque control that matters when you’re installing delicate hardware, tightening hinge screws on a cabinet door, or working near finished surfaces where an accidental slip with a drill could gouge the wood. They’re also essential in tight spaces where a cordless drill won’t fit and for final tightening when you need to feel exactly how snug a connection is.
Look for drivers with comfortable, non-slip handles that fit your grip, you’ll appreciate the ergonomics during longer assembly sessions. Magnetic tips are worth seeking out because they hold screws on the driver, making one-handed installation possible and preventing dropped fasteners in awkward positions. A basic six-piece set handles most carpentry needs, though having a few specialty sizes expands your capabilities as projects grow more complex.
15. Nail Set: For Professional-Looking Finishes
A nail set is a small but mighty tool that separates amateur work from professional finishes. This tapered metal punch drives finish nails below the wood surface, typically 1/16 to 1/8 inch deep, creating a small depression you can fill with wood putty before painting or staining. Without it, nail heads sit flush or slightly raised, telegraphing every fastener location and making smooth paint finishes nearly impossible.
The secret is matching tip size to your nail gauge. Most carpenters keep three sizes on hand: 1/32-inch for delicate trim brads, 2/32-inch for standard finish nails, and 3/32-inch for heavier casing nails. Using too large a tip damages the surrounding wood and leaves an oversized hole; too small, and the set slips off the nail head, marring your carefully installed trim.
The technique is straightforward but requires a light touch. Position the nail set squarely on the nail head, tap gently with your hammer until the head sinks just below the surface, then stop. Over-driving creates deeper holes that waste filler and weaken the connection. Once you’ve set all nails in a section, fill the depressions, let dry, sand smooth, and your fasteners disappear completely, the hallmark of thoughtful craftsmanship.
16. Clamps: The Extra Hands You Always Need
Clamps are often called a woodworker’s extra hands, and that nickname perfectly captures their value. You’ll use them constantly, holding pieces together while glue dries, securing workpieces for safe cutting or routing, and assembling complex projects that would be impossible to manage solo.
Start with a variety of types because each excels at different tasks. Bar clamps (24-inch and 36-inch lengths work for most home improvement projects) apply even pressure across wide glue-ups like tabletops or cabinet doors. C-clamps grip smaller pieces and provide concentrated pressure where you need it most. Spring clamps offer quick, one-handed operation perfect for holding trim in place while you mark cuts or temporarily securing jigs.
Here’s the truth every carpenter learns: you can never have too many clamps. A simple chair assembly might need eight clamps simultaneously, and nothing derails momentum faster than stopping mid-glue-up because you ran out. Proper clamping pressure ensures tight joints that stay strong for decades, preventing gaps that weaken structures and ruin finishes.
Buy a few of each type initially, then expand your collection as projects reveal what you reach for most often.
Specialty Tools for Precision Work
17. Miter Saw: Perfect Angles Every Time
A miter saw transforms challenging angled cuts into repeatable precision, essential when trim joints and picture frames need to look crisp and professional. This stationary power tool rotates its blade to cut precise angles across the width of boards, making it indispensable for crown molding, baseboards, and any project where visible corners meet.
Standard miter saws pivot left and right for angled cuts, while compound miter saws add a tilting head that bevels the blade for cuts at two angles simultaneously. If you’re tackling crown molding or complex trim work, the compound version saves setup time and expands your capabilities. For basic framing and simple trim, a standard model handles 90-degree crosscuts and common miters beautifully.
You’ll use 45-degree angles constantly for picture frames and outside corners, 22.5 degrees for octagonal projects, and 90 degrees for square crosscuts. The beauty of a miter saw lies in its repeatability, set the angle once, and every piece comes out identical. That consistency matters enormously when twelve pieces of baseboard need to wrap around a room with tight, gap-free joints.
Precision here isn’t perfectionism; it’s the difference between joints that require caulk and filler versus corners that fit together cleanly. When your cuts are accurate, your finished projects look crafted rather than cobbled together.
18. Router: Edges, Grooves, and Creative Profiles
A router opens up a world of decorative and functional possibilities in carpentry. This versatile power tool spins a cutting bit at high speed to shape edges, cut grooves, and create joints that would be tedious or impossible by hand.
You’ll encounter two main types. Fixed-base routers excel at edge work and table mounting, once you set the depth, it stays put. Plunge routers let you lower the spinning bit into the middle of a workpiece, perfect for mortises and stopped grooves. Many woodworkers eventually own both, but a fixed-base router covers most home improvement needs when you’re starting out.
The magic happens with interchangeable bits. Roundover bits soften sharp edges on shelves and tabletops. Roman ogee and cove bits add elegant profiles to trim and furniture. Straight bits cut dadoes for shelf supports and grooves for panel inserts. Rabbeting bits create recessed edges for cabinet backs and picture frames.
Start with a basic bit set and add specialty profiles as projects demand. A 1/4-inch and 1/2-inch collet adapter expands your options. With practice, you’ll find yourself reaching for the router whenever you want to elevate a project from plain to polished.
19. Moisture Meter: Prevent Future Problems
Wood’s moisture content is one of those invisible factors that can make or break your carpentry project months after you’ve finished. Fresh lumber from the lumberyard might look perfect today, but if it’s too wet, it’ll shrink as it dries in your home, leaving gaps in your carefully fitted joints and warped boards where everything was once flush.
A moisture meter takes the guesswork out of this equation. These handheld devices use pins or sensors to measure the percentage of moisture inside your wood. For most indoor carpentry and furniture projects, you want lumber between 6% and 8% moisture content. Outdoor projects can tolerate slightly higher readings, around 9% to 14%, depending on your climate.
Check your wood before starting any project where dimensional stability matters, cabinets, built-ins, flooring, or furniture. It takes just seconds to test a board, and that quick measurement can save you from discovering warped cabinet doors or gapped tabletops six months down the road. Pay special attention to hardwoods and wider boards, which are more prone to movement. Even if you’re buying from a reputable supplier, verify the moisture content yourself. Storage conditions vary, and that “kiln-dried” stamp doesn’t guarantee the wood stayed dry during transport and storage.
Safety and Support Equipment
20. Safety Glasses: Protect Your Vision
Safety glasses are non-negotiable whenever you pick up a power tool or work with wood. Flying wood chips, sawdust, and debris can cause serious eye injuries in an instant. Look for glasses that meet ANSI Z87.1 impact-resistance standards, this certification ensures the lenses can withstand high-velocity particles without shattering.
Comfort matters for extended wear. Choose glasses with adjustable nose pieces and wraparound designs that protect from side angles without creating pressure points. If you wear prescription glasses, opt for safety glasses designed to fit over them, or invest in prescription safety eyewear.
Anti-fog coating becomes essential when moving between temperature changes or during physical work that generates body heat. Fogged lenses tempt you to remove protection at the worst moment. Many modern safety glasses offer built-in anti-fog treatments that make extended workshop sessions far more pleasant and safer.
21. Hearing Protection: Preserve Your Ears
Prolonged exposure to power tools gradually damages your hearing, and the harm accumulates over time even when individual sessions don’t seem deafening. A circular saw typically produces 90-100 decibels, and sustained exposure above 85 decibels causes permanent hearing loss. Earplugs offer portability and work well under other safety gear, with foam versions providing 29-33 NRR (Noise Reduction Rating) when inserted properly. Earmuffs deliver 21-31 NRR and slip on instantly without touching your ears, making them convenient for quick tasks or when you’re moving between noisy and quiet work. For maximum protection during extended power tool use, wear both together. Check the NRR number on packaging, higher ratings block more sound, and replace foam plugs regularly as they lose effectiveness with repeated use. Your future self will thank you for protecting your hearing now, because once it’s gone, you can’t get it back.
22. Work Gloves: Hand Protection and Grip
Work gloves aren’t about wrapping your hands in thick padding and losing the ability to feel what you’re doing. The right pair depends entirely on the task at hand. When you’re hauling rough-cut lumber or pressure-treated boards, thick leather or synthetic gloves with reinforced palms protect against splinters and abrasions. These heavier gloves shine when moving materials, but they’re too bulky for precision work.
For assembly tasks, drilling, or using hand tools where you need to feel fasteners and maintain control, switch to lighter mechanics gloves or gloves with synthetic palm grips. These give you dexterity while still protecting against minor scrapes and providing better grip on smooth tool handles. Some carpenters keep fingerless gloves for maximum tactile feedback during fine detail work.
The balance between protection and dexterity matters more than finding one perfect glove. Keep both heavy-duty and light-duty pairs in your shop, and change them based on what the project demands. Your hands are irreplaceable tools themselves, protect them intelligently without sacrificing the control that makes good carpentry possible.
23. Workbench: Your Carpentry Foundation
A solid workbench transforms your carpentry experience from frustrating to productive. You need a stable surface that won’t wobble when you’re planing, sawing, or assembling projects, nothing derails precision like a bench that shifts under pressure.
Look for a workbench with a flat top at comfortable working height (typically 34 to 36 inches), heavy construction that dampens vibration, and enough surface area for your typical projects. A built-in vise lets you secure workpieces for cutting, chiseling, or shaping hands-free. Dog holes, evenly spaced openings across the benchtop, work with bench dogs or holddowns to clamp boards flat or perpendicular to the surface, essential for edge work and joinery.
Space considerations matter. Measure your workshop realistically and allow clearance to move around the bench. If storage is tight, consider cabinet workbench combinations that provide tool organization underneath. Major retailers offer various options in 2026, with free shipping and in-store pickup available on qualified products. For example, workbench-cabinet combos with integrated tool storage run around $2,900, providing both work surface and organization in one footprint.
Start with what fits your space and budget. Even a basic sturdy bench opens up project possibilities that sawhorses can’t match.
Organization and Maintenance Tools
24. Tool Belt or Apron: Keep Essentials Within Reach
A good tool belt or apron transforms your workflow by keeping frequently-used items, pencil, tape measure, speed square, drill bits, fasteners, right at your waist instead of forcing constant trips back to your workbench. You’ll find yourself working faster and more confidently when the next tool you need is always within arm’s reach.
Canvas aprons offer lightweight comfort and typically cost less, making them excellent for general carpentry and finishing work where you’re moving around frequently. They wash easily and won’t weigh you down during long projects. Leather tool belts provide superior durability and structure, with reinforced pouches that hold heavier items like hammers and drills securely. The trade-off is extra weight and break-in time.
Look for multiple pocket configurations that match your typical tasks. Dedicated slots for pencils, tape measures, and utility knives prevent fumbling, while deeper pouches handle fasteners and small hand tools. Adjustable straps ensure comfortable fit as you layer clothing seasonally. Start with a basic canvas apron for lighter work and consider upgrading to leather as your projects and tool collection expand.
25. Sharpening System: Maintain Peak Performance
Sharp tools aren’t just more effective, they’re significantly safer. A dull chisel or plane blade requires excessive force and can slip unpredictably, while a sharp edge cuts cleanly with controlled pressure. You’ll also achieve smoother surfaces and more accurate joinery when your cutting edges are properly maintained.
For beginners, a combination sharpening stone with coarse and fine grits (typically 1000/6000) provides an excellent starting point for chisels and plane blades. Flatten the stone before use, maintain a consistent angle (usually 25-30 degrees for chisels), and work through progressive grits until you can shave hair off your arm. A honing guide clamps onto the blade and holds the correct angle, eliminating guesswork while you develop muscle memory.
For hand saws, a small triangular file matched to your saw’s tooth size keeps crosscut and rip saws cutting efficiently. Many woodworkers send specialized saws out for professional sharpening initially, then learn the technique as their skills advance. Regular honing between projects, even just a few strokes on a fine stone, keeps edges performing at their best and extends the time between full sharpening sessions.
Building Your Carpentry Tool Collection Wisely
Building your carpentry tool collection doesn’t require spending a fortune upfront. Start with the measuring and marking essentials, tape measure, combination square, level, and carpenter’s pencils, then add a quality hammer, hand saw, and basic chisel set. These foundational tools let you tackle many home improvement projects while you develop your skills and discover which specialty tools your particular interests demand.
When you’re ready for power tools, the cordless drill/driver should be your first purchase, followed by a circular saw. Both offer tremendous versatility for the investment. Balance quality with budget by choosing mid-range brands that offer solid performance without premium pricing, and watch for sales at major retailers where qualified products often come with free shipping or Buy Online Pick Up in Store options in 2026.
Consider used tools from reputable sources for items like hand planes, vintage chisels, and cast-iron tools that were built to last. Inspect carefully for rust, damage, or excessive wear, but don’t shy away from pieces that just need cleaning and sharpening. This approach aligns with sustainable craftsmanship values while stretching your budget further.
Expand your collection gradually as projects require specific tools rather than buying everything at once. You’ll make more informed choices once you understand how each tool fits your workflow, and you’ll appreciate quality upgrades more after experiencing what each tool accomplishes.
Key Details to Know
Keeping your carpentry tools in peak condition and using them effectively requires attention to a few critical practices that often get overlooked in the excitement of starting new projects. Master these fundamentals and your tools will serve you well for decades.
- Store cutting tools with blade guards or in dedicated slots to prevent dulling and protect yourself from accidental contact
- Check power tool batteries regularly and keep at least one spare charged so you’re never stuck mid-project waiting for power
- Clean sawdust and debris from tools after each use, buildup affects accuracy and shortens tool life
- Invest in quality measuring tools first since inaccurate measurements compound through every step of a project
- Always learn tool safety procedures before operating any power tool, especially routers and circular saws
- Mark your tape measure and square with paint or tape so they stand out in a cluttered workspace
- Keep a dedicated notebook in your workshop to track which tools need sharpening or maintenance
These habits become second nature quickly but make an enormous difference in both the quality of your work and your enjoyment of the craft. The time you spend maintaining and organizing your tools pays back tenfold in efficiency and safety.
Common Questions About Carpentry Tools
New carpenters often have similar questions about tools, and understanding the answers helps you make confident choices as you build your workshop. Whether you’re looking for beginner woodworking help or ready to make your first purchases, these answers address the most common concerns we hear from our community.
What tools do I need to start carpentry?
Begin with the measuring and marking essentials, tape measure, combination square, carpenter’s pencil, and level, then add a hammer, cordless drill/driver, hand saw, and basic chisel set. These eight tools handle most beginner home improvement projects and establish fundamental skills.
Should I buy cordless or corded power tools?
Cordless tools offer freedom of movement and convenience for home improvement carpentry, making them ideal for most beginners in 2026. Corded tools provide consistent power without battery concerns, so consider them if you work primarily in one location with accessible outlets.
How much should I spend on my first tool set?
Expect to invest $300 to $600 for quality starter tools that will serve you for years. Prioritize buying fewer high-quality essentials over many cheap tools that frustrate you with poor performance, and watch for availability options like free shipping from major retailers.
What’s the difference between carpentry tools and woodworking tools?
Carpentry tools focus on construction and structural work with dimensional lumber, while woodworking tools include more specialized equipment for fine furniture and detailed joinery. The tools on this list serve both purposes and support the full range of projects beginners typically tackle.
Remember that building your tool collection is a journey, not a race. Start with what you need for your current project, learn each tool thoroughly, and expand thoughtfully as your skills and ambitions grow. The carpentry community values knowledge and craftsmanship far more than the size of your tool collection.
Equipping yourself with these essential carpentry tools opens the door to countless home improvement possibilities. You don’t need everything at once, start with the measuring and marking basics, add a few hand tools, then gradually expand as your confidence grows. Each project you tackle, whether it’s kitchen woodworking or simple beginner pallet projects teaches you something new and builds your skills.
At Wood & Work, we believe that sustainable craftsmanship begins with quality tools and hands-on learning. The right equipment doesn’t just make carpentry easier, it makes it genuinely enjoyable. You’ll find satisfaction in precise measurements, clean cuts, and joints that fit perfectly because you took the time to use proper tools.
Your workshop journey starts with that first tape measure or saw. Join our community of makers who’ve discovered the pride of creating functional beauty from raw lumber. Pick up a tool today and begin building.