
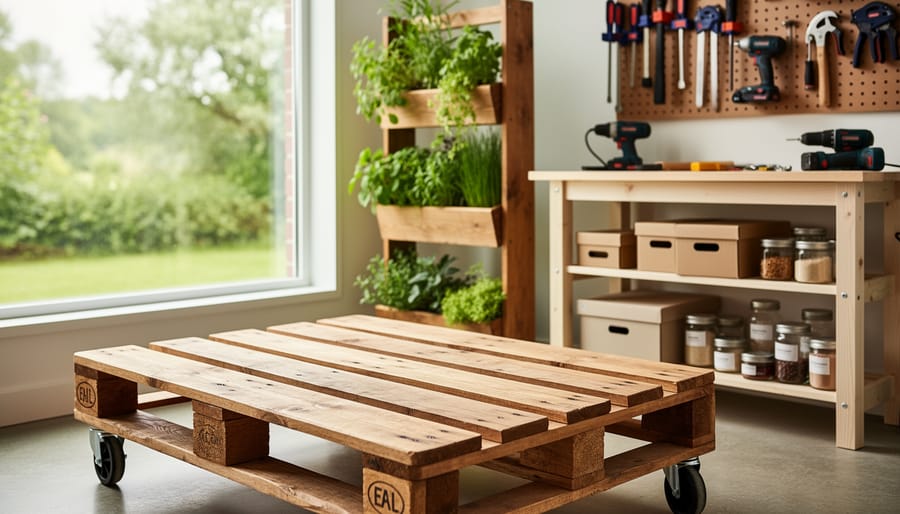
DIY wooden pallet projects transform free or low-cost reclaimed lumber into functional furniture and décor for your home, garden, and workspace. You can build everything from rustic coffee tables and vertical planters to outdoor benches and storage shelves using basic tools and straightforward techniques, even if you’ve never worked with pallets before.
The beauty of pallet woodworking lies in its accessibility. Most pallets destined for landfills can become statement pieces with a few hours of effort, making this one of the most sustainable and budget-friendly ways to dive into woodworking. You’re not just saving money; you’re learning fundamental carpentry skills like measuring, cutting, sanding, and finishing while keeping usable materials out of the waste stream.
What makes pallet projects especially appealing is their forgiving nature. The wood comes pre-aged with character marks and color variations, so small imperfections blend right in. Beginners often find pallet work less intimidating than other small DIY projects because the rustic aesthetic means you don’t need precision joinery or flawless finishes to create something beautiful.
This guide walks you through everything you need to know: how to source safe pallets, the preparation steps that ensure quality results, and twelve projects organized by skill level. You’ll learn which tools make the work easier, how to avoid common safety pitfalls, and finishing techniques that protect your creations for years of use. Whether you want to furnish a room on a tight budget or simply enjoy the satisfaction of building something with your own hands, pallet woodworking offers an inspiring starting point.
What You’ll Need to Get Started
Finding and Selecting Safe Pallets
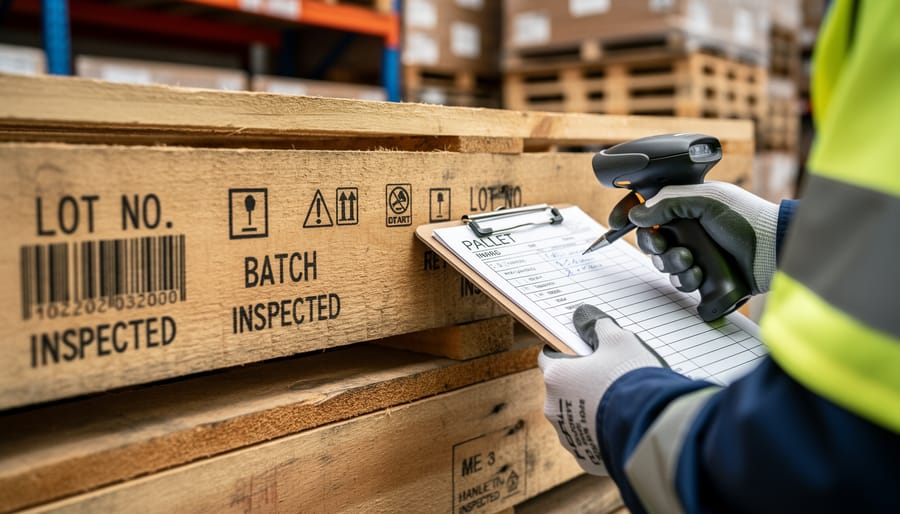
Not all pallets are safe for DIY projects, especially if you’re building furniture for indoor use or anything that contacts food. The good news? Learning to spot safe pallets takes just a few minutes.
Decoding the Stamp
Look for a rectangular stamp on the pallet’s stringer or deck board. The most important marking is “HT” (heat-treated), which means the wood was heated to kill pests, no chemicals involved. These pallets are your go-to choice. If you see “MB” (methyl bromide), walk away. This chemical fumigant is toxic and has no place in your home projects.
You’ll also see an IPPC logo and country code (like “US” or “CA”). The two-letter code after that identifies the manufacturer, but what matters most is finding that HT stamp.
Where to Source Free Pallets
Call local garden centers, hardware stores, or furniture retailers. Many businesses give away pallets regularly and appreciate not paying disposal fees. Small operations are often more accommodating than big-box chains. Check behind strip malls early in the week when deliveries arrive.
Choosing Quality Pallets
Skip pallets that are cracked, heavily weathered, or show dark stains (potential chemical spills or mold). Slight discoloration from moisture is normal, but if it smells musty or has soft, rotting sections, keep looking. Hardwood pallets are sturdier than softwood but harder to dismantle. For your first project, pristine condition beats perfect wood species every time.
Essential Safety Guidelines
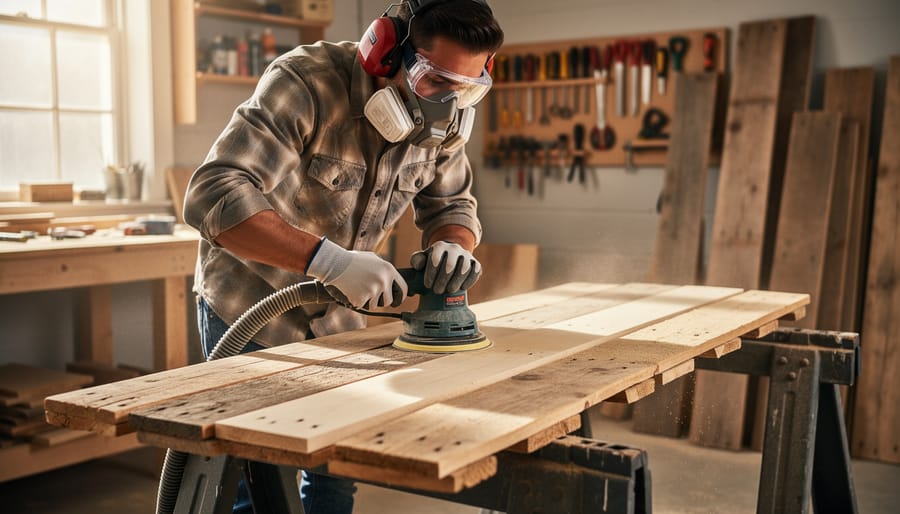
Working with reclaimed pallet wood is rewarding, but it comes with real risks that you need to take seriously. Before you cut the first board or drive the first screw, spend a few minutes setting yourself up for safe, injury-free work. These aren’t just suggestions, they’re the habits that keep experienced woodworkers in one piece.
Start with the right protective gear every single time. Safety glasses protect against flying debris and splinters, which happen constantly when you’re prying apart old wood. A dust mask or respirator is non-negotiable when sanding, pallet wood collects years of dirt, and you don’t want that in your lungs. Heavy work gloves give you grip and protect your hands from splinters and rough edges, though you’ll want to remove them when operating power tools to maintain full control.
Inspect every pallet thoroughly before you start. Look for protruding nails, loose boards, and any signs of rot or mold. Run your hands over the surface to feel for rough spots you can’t see. If something looks or smells off, find a different pallet. Reclaimed wood can hide surprises, and it’s better to be picky than to work with questionable material.
When dismantling pallets, work slowly and deliberately. Pallet nails are designed to hold tight, and rushing the process bends nails, splits boards, and can cause tools to slip dangerously. Keep your workspace clear of trip hazards and make sure you have good lighting. If you’re using power tools, check that cords are in good condition and that blades are sharp, dull blades require more force and are more likely to bind or kick back.
Always work in a well-ventilated area, especially when sanding or applying finishes. Open garage doors, set up fans, or work outside when weather permits. The dust and fumes from stains, paints, and sealers need somewhere to go besides your lungs.
How to Dismantle and Prepare Pallet Wood
Dismantling pallets is where most beginners stumble, but it’s actually straightforward once you know the right approach. The method you choose depends on your tools, how intact you need the boards, and how much time you’re willing to invest. A gentle approach preserves more usable wood, while faster methods trade some board breakage for speed.
Before you start swinging a hammer, take a minute to understand what you’re working with. Flip the pallet over and look at how it’s constructed. Most pallets have deck boards (the top planks), bottom boards, and stringers (the thick support beams). You’ll see nails driven in from the top and sometimes twisted or ringed shank nails that really don’t want to come out. Knowing where every nail sits saves you from splitting boards unnecessarily.
- Inspect the pallet thoroughly, checking for loose boards, visible damage, and the number of nails in each connection point. Mark any boards you definitely want to keep intact.
- Choose your dismantling method based on available tools and board condition. Use a pry bar and hammer for maximum wood recovery, or a reciprocating saw with a metal-cutting blade to cut nails flush when speed matters more than preserving every board.
- Remove all fasteners completely, either by prying boards free and pulling nails with a claw hammer, or by cutting through nails and punching out the remaining stubs with a nail set and hammer.
- Sand all rough edges, splintered areas, and surfaces with 80-grit sandpaper, working up to 120-grit for a smoother finish. Pay extra attention to cut ends and anywhere you’ll be handling the wood.
- Clean each board with a stiff brush to remove dirt and debris, then inspect for cracks, rot, or embedded metal. Set aside any questionable pieces rather than discovering problems mid-project.
- Cut boards to your project dimensions using a circular saw or miter saw, measuring twice and cutting once. Stack prepared boards by size to keep your workspace organized.
The pry bar method works best when you want to salvage every board. Start at one end, working the flat pry bar between the deck board and stringer. Tap it gently with a hammer until you create a small gap, then lever the board up gradually. Move to the next nail point and repeat, rushing this step splits boards. For stubborn nails, slip a wood block under your pry bar for extra leverage and to protect the board underneath.
A reciprocating saw cuts your dismantling time in half. Slide the blade between boards where the nail sits and cut straight through the fastener. You’ll lose about an inch of board width at each cut point, but if you’re building something like a coffee table or planter box where exact dimensions don’t matter, this method gets you working on the actual project faster. Just wear safety glasses, metal shavings fly everywhere.
12 Pallet Projects You Can Build This Weekend
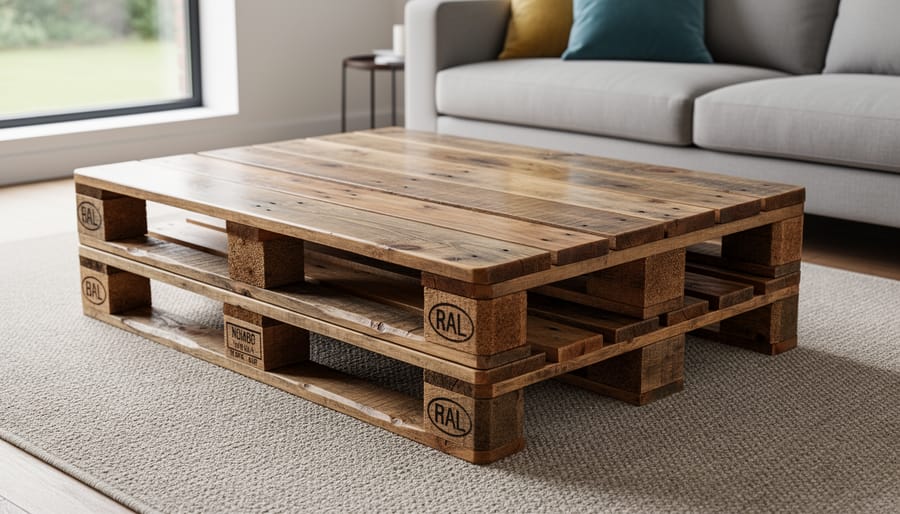
1. Rustic Coffee Table
A coffee table is the perfect starter project because you can build a functional piece with minimal cuts. For the simplest version, sand one standard pallet thoroughly, apply your chosen finish, and attach four caster wheels to the bottom corners using wood screws and washers. That’s it, you’ve got a mobile coffee table in an afternoon.
For a sturdier design, stack two pallets and secure them with wood glue and 3-inch screws driven through the top pallet into the bottom one at each corner and the center support. This creates a lower shelf perfect for magazines or remotes. Sand all exposed surfaces with 120-grit sandpaper, paying extra attention to the top and edges where hands will touch. Finish with polyurethane for durability or leave it natural for a raw industrial look.
2. Vertical Garden Planter
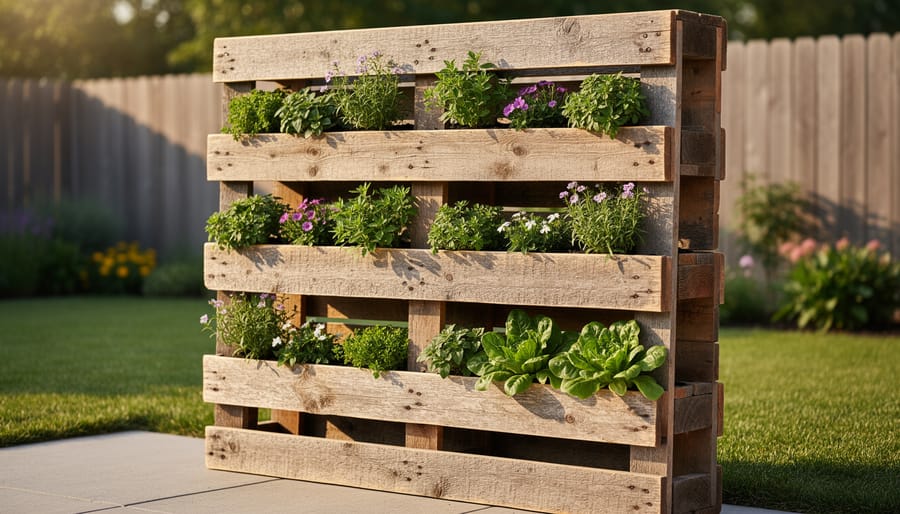
A vertical garden planter transforms a single pallet into a living wall of herbs, succulents, or flowers. Stand the pallet upright and attach landscape fabric or weed barrier to the back and bottom using a staple gun, creating pockets to hold soil. Fill these pockets with potting mix, then plant your selections between the slats. For wall mounting, use heavy-duty L-brackets or French cleats rated for outdoor use, securing directly into wall studs to support the weight when soil is wet. If building a freestanding version, attach a simple wooden base or legs at a slight backward angle for stability. Drill small drainage holes through the fabric at the bottom of each pocket to prevent water pooling and root rot.
3. Outdoor Patio Furniture Set
A pallet patio set transforms your outdoor space without the furniture store price tag. Start with two or three pallets stacked and secured with wood screws to create a low-profile sofa base, add a backrest by attaching one pallet vertically at a right angle. For matching chairs, use single pallets as seats with armrests fashioned from cut pallet boards. Sand everything thoroughly since outdoor furniture gets constant contact.
Weather protection is non-negotiable here. Apply two coats of exterior polyurethane or marine-grade sealant, letting each coat dry completely. Alternatively, outdoor deck stain offers color and protection in one step. Raise your furniture slightly off the ground using blocks or feet to prevent moisture damage from below.
Finish with outdoor cushions sized to your pallet dimensions, standard pallet widths work perfectly with readily available cushion sizes. Reapply sealant annually to keep your set looking fresh through seasons of use.
4. Wall-Mounted Shelving Unit
Pallet shelves transform bare walls into functional display space with minimal effort. Start by selecting three to four evenly-sized pallet sections, the already-flat top boards work perfectly as ready-made shelves. Sand thoroughly since kitchen and bathroom environments demand smooth surfaces that won’t snag dish towels or clothing.
Mount directly into wall studs using heavy-duty screws and washers, not just drywall anchors. Each shelf should penetrate studs at least 1.5 inches deep to support books, dishes, or decor safely. Space shelves 10-12 inches apart for standard storage, or adjust based on what you’ll display.
For bathrooms, apply water-resistant polyurethane to prevent moisture damage. In kitchens, seal with food-safe finish if shelves will contact dishes. Leave the wood natural for rustic charm, or paint to match your room’s palette, white brightens small spaces, while dark stains add warmth.
5. Headboard for Your Bedroom
A pallet headboard transforms your bedroom with rustic charm while giving you complete control over size and style. You can mount pallet boards horizontally for a wide, clean look or arrange them vertically to add height and visual interest. Start by measuring your bed width, add 2-4 inches on each side for a properly proportioned headboard.
Sand every surface thoroughly since you’ll be leaning against it nightly. Any rough spots or splinters become immediate problems. Attach the headboard directly to wall studs using heavy-duty brackets, or secure it to your bed frame using bolts if you prefer a non-permanent solution. This approach also works for renters who can’t drill into walls.
For finishing, choose low-VOC stains or paints designed for indoor use. The fumes matter in a bedroom. Apply at least two coats of polyurethane to protect against oils from your hair and skin, which can stain raw wood over time.
6. Garden Tool Organizer
A pallet-mounted tool organizer transforms chaos into order and keeps shovels, rakes, and hand tools off the floor where they belong. Stand your pallet vertically and secure it to wall studs with lag bolts, drywall anchors won’t support the weight of loaded garden tools. Space heavy-duty hooks or eye bolts along the horizontal slats, positioning them about 8 to 12 inches apart depending on your tool collection. Place larger implements like shovels and hoes on the lower sections where you can reach them easily, and hang lighter items like trowels and pruners higher up. If you’re mounting in a damp shed, apply exterior wood sealer first to prevent rot. This simple system keeps everything visible and accessible, cutting your garden prep time in half.
7. Pet Bed Frame
Start by measuring your pet while they’re sleeping, add 6-8 inches to their stretched-out length and width for comfort. Cut pallet slats to size, then sand everything obsessively smooth. Rough edges or splinters that wouldn’t bother us can injure paw pads and noses, so run your hand over every surface until it feels like furniture, not reclaimed wood.
Build a simple rectangular frame with corner supports, then attach slats across the top, leaving small gaps for airflow. For elevated designs, add 4-6 inch legs cut from sturdier pallet posts. Skip chemical finishes, pets lick everything. A light coat of pet-safe mineral oil works if you need protection, but bare sanded wood is safest. Drop in a washable cushion and you’ve got a bed that’ll outlast the store-bought fabric ones.
8. Kitchen Island or Cart
A pallet kitchen island brings extra workspace and storage exactly where you need it. Start with two or three pallets stacked and secured together for the base structure, reinforcing the joints with wood glue and screws driven through pre-drilled holes. Add locking casters to the bottom corners if you want mobility, or skip them for a permanent installation. Create a sturdy countertop by arranging cleaned pallet boards tightly together on top, securing them from underneath, then sand everything smooth with 120-grit followed by 220-grit paper. For a food-safe surface where you’ll prep ingredients, finish the top with mineral oil or beeswax, reapplying every few months. The sides work great for open shelving or you can add reclaimed boards as dividers. This kitchen woodworking project typically takes a weekend and instantly adds character plus function to your cooking space.
9. Outdoor Bar or Serving Station
An outdoor bar transforms your patio into an entertainment hub, and pallets provide the perfect rustic framework. Start with two full pallets stood vertically as the bar’s front and back panels, connected by horizontal support beams. Add a weatherproof countertop, marine plywood sealed with polyurethane works brilliantly, overhung slightly for comfortable standing room.
Build in a lower shelf between the pallet panels for bottle storage, spacing it to accommodate standard wine or liquor bottles. Cut circular holes in the countertop as built-in drink holders, or attach metal bucket holders to the front for ice and garnishes. Sand all surfaces thoroughly since guests will lean against and interact with every part.
Weatherproofing matters here. Apply exterior wood stain followed by three coats of spar urethane, which handles sun exposure and spilled drinks better than standard polyurethane. Let each coat cure fully. For mobility, attach locking casters so you can relocate the bar or roll it under cover during harsh weather.
10. Shoe Rack or Entryway Organizer
A tiered shoe rack transforms a single pallet into practical entryway storage. Stand the pallet vertically and reinforce it with a plywood backing for stability, or lay it horizontally and add angled slats between the existing boards to create individual shoe cubbies.
Space your shelves 6-8 inches apart to accommodate most shoe styles, including boots on the bottom tier. A standard pallet creates three to four usable levels, holding roughly 9-12 pairs depending on your design. Sand all edges thoroughly since you’ll reach into this organizer daily.
For mudrooms, add hooks above the rack for coats and bags. In closets, mount the unit to the wall with L-brackets to prevent tipping when loaded. A light stain or paint helps the rack blend with your existing décor while protecting the wood from scuffs.
11. Picture Frame or Wall Art
Pallet slats make stunning wall art with minimal effort. For a simple frame, cut four slats to your desired dimensions and miter the corners at 45 degrees, then glue and nail them together around a photo or print. Alternatively, arrange weathered slats horizontally as rustic backing for a canvas or mirror, the varied grain and color create instant character.
To enhance the aged look, try distressing: lightly sand edges and corners where natural wear would occur, then apply a dark stain and immediately wipe most of it away, leaving pigment in the grain. For hanging, use picture wire strung between two screw eyes on the back, or mount a sawtooth hanger centered on the top rail. These pieces work brilliantly in gallery walls or as standalone statement art above furniture.
12. Compost Bin
A compost bin is one of the most practical pallet projects you can build, especially if you garden. The slatted design of pallets naturally provides the airflow composting needs to work efficiently. You’ll need three pallets for a basic three-sided bin, just stand them upright in a U-shape and secure the corners with deck screws or galvanized corner brackets. Leave the front open so you can turn the compost and scoop out finished material.
Space the pallets about half an inch apart at the corners to maintain airflow on all sides. Some builders add a fourth pallet as a removable front panel, attaching it with hinges or simple hook-and-eye latches for easier access. Position your bin directly on soil rather than concrete, this allows beneficial organisms to move up into your compost pile and helps with drainage.
Skip any finish or sealant here. The wood will break down over time from moisture, which is fine, that’s part of the natural cycle, and you can replace a side every few years if needed.
Finishing Techniques That Bring Your Projects to Life
The finish you choose can completely transform your pallet project, turning raw, weathered boards into a piece that looks store-bought or preserving that rustic charm while protecting the wood for years of use. The right finish not only enhances the grain and color but also shields your work from moisture, UV rays, and everyday wear.
Start by deciding whether your project lives indoors or faces the elements. Indoor pieces like headboards or picture frames can handle lighter finishes that showcase the wood’s natural character, while outdoor furniture and planters need robust, weather-resistant protection. Sanding is your foundation, work up to at least 120-grit for painted pieces and 220-grit if you want to feel the silky smoothness of a clear finish.
Here are your go-to finishing options and when each one shines:
- Natural oil (linseed, tung, or Danish oil), penetrates deep, enriches grain, perfect for indoor furniture and cutting boards; requires reapplication every few years
- Wood stain, adds color while letting texture show through; ideal for matching existing furniture or creating a vintage look
- Paint, full coverage for a modern or shabby-chic aesthetic; use exterior-grade for outdoor projects and prime bare wood first
- Whitewash or limewash, diluted paint technique that highlights grain; gorgeous for coastal or farmhouse styles
- Polyurethane sealant, tough topcoat for high-traffic indoor pieces; choose water-based for less yellowing or oil-based for deeper amber warmth
- Marine-grade spar varnish, essential for outdoor projects; flexible formula resists cracking as wood expands and contracts
Testing your finish on scrap pallet wood first saves heartbreak, what looks great in the can might surprise you on weathered grain. Track your experiments and results in a woodworking journal so you can replicate winning combinations. For distressing effects, try dry-brushing contrasting colors, chain-whipping edges, or sanding through paint layers to reveal wood beneath. If you’re exploring advanced finishing techniques virtually, Workshop XR offers immersive practice without wasting materials.
Always apply finish in a well-ventilated space and let each coat cure fully, rushing this final step undermines all your careful work.
Testing Your Work and What to Build Next
Before you call any project finished, give it a proper inspection. Run your hands across every surface to catch splinters or rough edges you might’ve missed, sand them smooth before anyone else discovers them the hard way. Test joints by applying gentle pressure where pieces connect; a wobbly coffee table won’t improve with time. If you applied stain or sealant, check that it’s fully cured by touching an inconspicuous spot, tacky finishes mean you need to wait another day or two before putting the piece into service.
Once you’ve nailed your first project, resist the urge to immediately tackle the most ambitious design on your list. Build momentum by choosing something slightly more challenging than what you just completed. That vertical planter teaches you about spacing and drainage; now try the headboard, which introduces alignment across multiple boards. The coffee table gives you confidence with structural stability; the outdoor bar applies those lessons with added complexity.
You’re not learning this craft in isolation. Wood & Work’s community courses connect you with fellow makers who’ve stood exactly where you are now, and our workshops provide beginner woodworking support that accelerates your progress beyond what any single tutorial can offer. Share photos of your finished pieces, ask questions when you hit a snag, and celebrate each project as proof that you’re mastering a craft that turns discarded materials into something genuinely useful and beautiful.
Common Questions About Pallet Projects
Are pallet projects safe to build and use indoors?
Yes, as long as you use heat-treated (HT-stamped) pallets and avoid chemically treated wood. Always sand thoroughly to remove splinters, and use non-toxic finishes for indoor furniture or anything that contacts food or skin.
Where can I find free pallets for my projects?
Check with local garden centers, small retail shops, construction sites, and warehouses, many businesses regularly discard pallets and are happy to give them away. Always ask permission before taking pallets, and inspect them carefully for treatment stamps and damage before loading them up.
How long will my pallet furniture last?
With proper preparation and finishing, indoor pallet projects can last decades, while outdoor pieces typically last 5-10 years depending on weather exposure and maintenance. Apply appropriate sealers or exterior paint annually to extend the life of outdoor furniture.
Do I need advanced woodworking skills to start with pallets?
Not at all, pallet projects are ideal for beginners because the wood is already cut to manageable sizes and many designs require only basic assembly. Start with simpler projects like shelves or plant stands to build your confidence before tackling more complex builds.
What should I do if my pallet wood is warped or twisted?
Slightly warped boards can often be straightened during assembly by securing them firmly to a flat frame, or you can cut out the good sections and discard damaged parts. For severely twisted wood, it’s best to set it aside and use it for smaller accent pieces or scrap.
These questions come up constantly in our workshops and online forums, and they’re completely valid concerns when you’re getting started. The learning curve with pallet wood is gentler than you might think, especially when you connect with other builders who’ve already worked through these challenges. Many woodworkers find support through local maker spaces or artisan co-ops where experienced builders share techniques for dealing with reclaimed materials.
One of the biggest advantages of pallet projects is how forgiving they are, if a board splits during dismantling or a joint doesn’t line up perfectly, you’ve lost nothing but a bit of time since your materials were free to begin with. This low-stakes environment is perfect for experimenting with new techniques, testing different finishes, or trying a design you’ve been curious about. The cost savings compared to buying new lumber are substantial, often 80-90% less for similar projects, which means you can afford to make mistakes and learn from them without the financial pressure that comes with expensive hardwoods.
You’ve got everything you need to turn a stack of reclaimed pallets into something remarkable. Whether you’re building your first coffee table this weekend or planning that vertical garden you’ve been dreaming about, you’re joining a community of makers who see possibility where others see scrap wood.
Every pallet project you complete is a small victory for sustainability. You’re keeping usable lumber out of landfills, reducing demand for new materials, and proving that beautiful, functional furniture doesn’t require a hefty budget or advanced skills. That worn wood has stories to tell, and now you get to write the next chapter.
Start simple if you’re new to this. Build that shoe rack or picture frame, get comfortable with the process, then tackle something bigger. The confidence you gain with each completed project compounds quickly. Before long, you’ll be eyeing pallets everywhere and mentally redesigning them into your next creation.
Don’t keep your finished projects to yourself. Share photos with fellow woodworkers, celebrate what you’ve built, and inspire someone else to pick up their first pallet. The Wood & Work community thrives when makers support each other, swap tips, and showcase their creativity.
Your workshop is calling. Grab those safety glasses, fire up the sander, and transform some humble pallet wood into something you’ll be proud to use every day. The skills you develop now will serve you for a lifetime of building.